Master how to draw realistic faces: A Complete Guide
how to draw realistic faces

Master how to draw realistic faces: A Complete Guide

Transform your art with expert techniques for capturing the nuanced beauty and expression of the human face.

Start Drawing Today

Key Takeaways

  • ✓ Mastering facial proportions is fundamental to realism.
  • ✓ Understanding light and shadow is crucial for creating depth.
  • ✓ Practice observing real faces to improve accuracy.
  • ✓ Don't be afraid to use reference photos as a learning tool.

How It Works

1
Understand Basic Proportions

Begin by familiarizing yourself with the average measurements and placements of facial features. This foundational knowledge forms the blueprint for any realistic face.

2
Sketch the Underlying Structure

Lightly draw the skull's basic shape and key guidelines for the eyes, nose, and mouth. This skeletal framework ensures anatomical correctness before adding detail.

3
Develop Features and Form

Refine individual features, paying close attention to their unique shapes and how they interact. Build up the face's three-dimensional form using light and shadow.

4
Apply Shading and Texture

Introduce a full range of values to create depth, volume, and realistic skin textures. This final stage brings the drawing to life, capturing subtle expressions and details.

The Foundation of Form: Understanding Facial Anatomy and Proportions

Classical bust with beauty tools on pink background, merging art with skincare. Photo: Hanna Pad / Pexels
Drawing a realistic face begins not with intricate details, but with a solid understanding of its underlying structure. Think of the human head as a complex, three-dimensional form, not a flat surface. The skull provides the primary scaffolding upon which all other features are built. Before you even pick up a pencil, spend some time observing skulls, either in person or through anatomical diagrams. Notice the prominent brow ridge, the deep eye sockets, the structure of the jawbone, and the curve of the cranium. These foundational shapes dictate how light falls on the face and how features are positioned. Without this anatomical awareness, your faces risk appearing flat or distorted, regardless of how well you shade them. Once you grasp the skull's general form, the next crucial step is mastering facial proportions. While every face is unique, there are widely accepted average measurements that serve as an excellent starting point. The 'Loomis Method' and the 'Reilly Abstraction' are two popular systems artists use to establish these proportions, offering a simplified, geometric approach to constructing the head. Generally, the face can be divided into thirds: from the hairline to the brow, from the brow to the base of the nose, and from the base of the nose to the chin. The eyes are typically positioned about halfway down the head, not just the face. The width of one eye often fits between the two eyes, and the corners of the mouth align with the pupils. The bottom of the nose usually falls halfway between the brow and the chin. These are not rigid rules, but flexible guidelines that help you achieve a believable framework. Deviations from these norms are what give individuals their unique character, but you must understand the norm before you can effectively (and intentionally) deviate. Practice drawing these basic proportional lines on multiple head shapes and angles. Don't worry about perfection at this stage; focus on internalizing the relationships between features. This foundational work will save you countless hours of frustration later on when you begin to add more intricate details. Understanding these proportions is like learning the alphabet before writing a novel; it's absolutely essential for coherent and compelling results. For more on foundational art skills, explore our guide on basic drawing techniques.

Bringing Features to Life: Eyes, Nose, Mouth, and Ears

Top view of anatomical sketches with drawing tools on a desk, showcasing artistic process. Photo: Anete Lusina / Pexels
With the foundational proportions established, it's time to delve into the individual features that define a face. Each element—eyes, nose, mouth, and ears—is a complex mini-sculpture in itself, requiring careful observation and rendering. The eyes are often considered the 'windows to the soul' and are arguably the most expressive feature. They are not simply flat circles but spheres nestled within sockets. Pay attention to the eyelids, which wrap around the eyeball, and the subtle curves of the tear duct and caruncle. The iris and pupil are central, but don't forget the subtle reflections and catchlights that give the eye its sparkle and sense of life. The eyebrows, too, play a vital role in expression and framing the eyes. Their shape, density, and direction of hair growth contribute significantly to the overall look. The nose, while often overlooked, is a highly sculptural element. It projects from the face, casting shadows and catching light. Observe the bridge, the tip, the nostrils, and the alar cartilages. The specific shape of these components varies greatly from person to person, so avoid drawing a generic 'triangle' for a nose. Instead, think of it as a series of planes and curves. The mouth is another incredibly expressive feature, capable of conveying a vast range of emotions. The lips are not flat lines but fleshy forms that wrap around the teeth and jaw. Notice the philtrum (the vertical groove between the nose and upper lip) and the subtle M-shape of the Cupid's bow. The corners of the mouth can lift or fall, creating smiles, frowns, or neutral expressions. Even when the mouth is closed, there's a subtle tension and form to consider. Finally, the ears, though often partially obscured by hair, are crucial for anatomical correctness and realism. They are complex cartilaginous structures with distinct ridges and folds (helix, antihelix, tragus, antitragus, lobe). Their placement is also important: typically, the top of the ear aligns with the brow, and the bottom aligns with the base of the nose. Understanding their structure and how they attach to the head will prevent them from looking like flat, pasted-on additions. When drawing any feature, remember to consider its three-dimensional form and how it interacts with the surrounding planes of the face. This holistic approach ensures that each feature feels integrated and realistic.

Mastering Light and Shadow: Creating Depth and Volume

Black and white close-up portrait of a smiling young woman with a joyful expression. Photo: Alexander Krivitskiy / Pexels
Once the foundational structure and individual features are in place, the true magic of realism emerges through the masterful application of light and shadow. This is where a two-dimensional drawing transforms into a convincing three-dimensional form. Light defines form, and shadow reveals volume. Without a full range of values – from the brightest highlights to the darkest core shadows – your drawing will appear flat and lifeless. Begin by identifying your light source. Is it coming from above, below, the side, or directly in front? The direction and intensity of the light source will dictate where highlights fall, where shadows are cast, and the overall mood of the portrait. Think of the face as a collection of interconnected planes, each catching light or falling into shadow differently. The forehead, cheekbones, nose, and chin are prominent planes that will typically receive more direct light. Areas like the eye sockets, under the nose, and beneath the lower lip will often be in shadow. Don't just draw outlines; instead, think about the light revealing the form. Use a variety of pencil pressures and blending techniques to create a smooth transition between values. Soft, gradual shading creates rounded forms, while sharper contrasts can define edges and planes. Pay attention to the difference between 'form shadows' (shadows that define the curve of an object) and 'cast shadows' (shadows cast by one object onto another, like the nose casting a shadow on the cheek). Reflected light is another critical element often overlooked by beginners. Even in shadowed areas, some light bounces off surrounding surfaces and illuminates parts of the shadow, preventing them from becoming completely black voids. This subtle reflected light adds richness and depth to your shadows. Additionally, consider the subtle nuances of skin tone. Skin is not a uniform color or value; it has variations in translucency, texture, and underlying blood flow, all of which affect how light interacts with it. Practice rendering different skin textures, from smooth forehead to slightly rougher chin. The interplay of light, shadow, and subtle textural variations is what ultimately breathes life into your realistic portraits. For more advanced techniques in shading, check out our guide on advanced drawing techniques.

Refining Details and Avoiding Common Mistakes

An artist skillfully sketches a hand in a Tokyo studio classroom, capturing intricate details. 
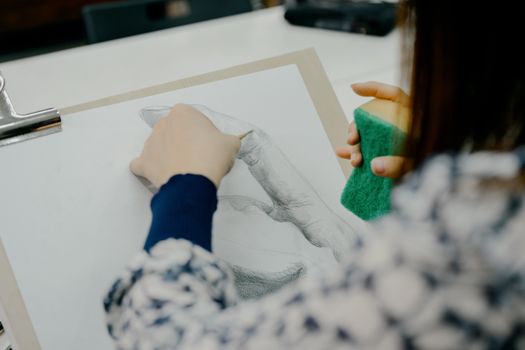
Photo: Gu Ko / Pexels
The final stage of drawing realistic faces involves refining details and stepping back to assess your work critically. This is where you add the subtle nuances that elevate a good drawing to a great one. Consider the texture of the skin, the stray hairs, the subtle lines around the eyes or mouth, and the minute variations in value that give a face its unique character. However, beware of over-detailing too early. Focus on the big forms first, then gradually introduce smaller details. Over-detailing before the underlying structure is sound can lead to a 'busy' but ultimately unrealistic drawing. Here are some common mistakes to avoid when drawing realistic faces: * **Symmetry Obsession:** No face is perfectly symmetrical. Trying to make both sides identical will result in a stiff, unnatural look. Embrace the subtle asymmetries that make a face unique and human. * **Drawing What You Know, Not What You See:** Our brains have preconceived notions of what eyes, noses, and mouths look like. Always refer to your reference material or live model, and draw what you actually observe, not what you think a feature 'should' look like. * **Flat Shading:** Avoid uniform shading. Real faces have a wide range of values, from bright highlights to deep shadows. Use a full tonal range to create depth and volume. * **Ignoring the Head's Form:** Drawing features as if they are pasted onto a flat surface. Remember the underlying skull and how features wrap around it in three dimensions. * **Exaggerating Features:** While caricature has its place, for realism, avoid making eyes too big, lips too full, or noses too sharp unless it's genuinely part of the subject's unique appearance. * **Lack of Structure for Hair:** Treat hair as a mass that follows the curve of the head, not just individual strands. Draw it in clumps and observe how light and shadow play across its form. * **Forgetting the Neck and Shoulders:** The head doesn't exist in a vacuum. Including a hint of the neck and shoulders helps ground the portrait and provides essential context for the head's position and angle. By carefully observing, understanding foundational principles, and consciously avoiding these pitfalls, you'll significantly improve your ability to draw truly realistic and compelling faces. Continuous practice and critical self-assessment are your best tools for growth.

Comparison

FeatureBest Option (Traditional)Alternative 1 (Digital)Alternative 2 (Hybrid)
MediumGraphite Pencils (H, HB, B, 2B, 4B, 6B)Procreate/Photoshop with TabletGraphite Sketch + Digital Finishing
Blending ToolsBlending Stumps, Tortillons, TissuesSoft Brushes, Smudge ToolBlending Stumps + Digital Smudge
ErasersKneaded Eraser, Vinyl EraserSoft Eraser BrushKneaded Eraser + Digital Eraser
Reference MaterialLive Model/High-Res PhotosHigh-Res Digital PhotosPhotos/Videos
Learning CurveModerate to HighModerate (if familiar with software)Moderate
CostLow (pencils, paper)High (tablet, software)Moderate (some traditional supplies + basic tablet)
FlexibilityLimited UndoInfinite Undos, LayersUndo for digital, permanent for traditional

What Readers Say

"This guide completely changed my approach to drawing faces. The sections on proportions and light were incredibly detailed and easy to follow. My portraits look so much more alive now!"

Sarah J. · Austin, TX

"As an aspiring artist, I always struggled with realism. This article broke down how to draw realistic faces into manageable steps, and I've seen a huge improvement in my work."

Mark P. · Chicago, IL

"Following these techniques, I was finally able to draw a portrait of my grandmother that she instantly recognized. The shading tips were particularly game-changing for adding depth."

Emily R. · Seattle, WA

"The content is excellent, though some of the anatomical terms required a quick google search. Still, the overall advice on how to draw realistic faces is top-notch and highly effective."

David L. · Miami, FL

"I'm a digital artist, and while the guide focuses on traditional mediums, the principles of light, shadow, and proportion translated perfectly. My digital portraits have never looked better!"

Jessica T. · Denver, CO

Frequently Asked Questions

What's the most important first step in learning how to draw realistic faces?

The most important first step is understanding basic facial anatomy and proportions. Establishing a solid structural foundation ensures that your features are placed correctly and your face appears three-dimensional and believable before you add any details.

I struggle with making my faces look symmetrical. Is that normal?

Yes, it's completely normal to struggle with symmetry! No human face is perfectly symmetrical. In fact, trying to force perfect symmetry can make your drawing look stiff and unnatural. Embrace subtle asymmetries to make your portraits more lifelike.

How do I make my drawings look less 'flat' and more three-dimensional?

To achieve three-dimensionality, focus heavily on light and shadow. Use a full range of values from bright highlights to deep core shadows, and pay attention to how light reveals the form of the face. Blending and understanding reflected light are key techniques.

Do I need expensive art supplies to draw realistic faces?

No, you don't need expensive supplies. You can start with just a few graphite pencils (like HB, 2B, 4B), an eraser, a blending stump, and some good quality paper. The most important 'tools' are observation, practice, and understanding of principles.

Is drawing from photos or live models better for learning?

Both have benefits. Live models offer a three-dimensional view and dynamic interaction, while photos provide a stable reference you can study for extended periods. It's best to practice with both to develop a well-rounded skill set.

Who should focus on learning how to draw realistic faces?

Anyone interested in portraiture, character design, figurative art, or simply improving their fundamental drawing skills will benefit greatly. It's a foundational skill for many artistic disciplines, from fine art to concept art.

What if my drawings don't look good initially? Should I give up?

Absolutely not! Drawing is a skill that develops with practice and perseverance. Everyone starts somewhere. Focus on learning from your mistakes, celebrating small improvements, and consistently putting in the effort. Artistic growth is a journey, not a destination.

Will AI-generated art replace the need to learn realistic drawing?

While AI art is a powerful tool, it won't replace the unique human creativity, nuanced observation, and deep understanding of form that traditional realistic drawing fosters. Learning to draw enhances your ability to understand and even direct AI tools more effectively, making you a more versatile artist.

Embark on your journey to artistic mastery. With dedication and the proven techniques outlined in this guide, you can confidently learn how to draw realistic faces that captivate and inspire. Pick up your pencil and start creating today!

Topics: how to draw realistic facesportrait drawing techniquesrealistic art tutorialface proportions artdrawing human features
Leo List
Brampton weed
Adultwork