Mastering How to Clean Oil Paintings Safely
how to clean oil paintings

Mastering How to Clean Oil Paintings Safely

Unlock the secrets to preserving your treasured oil paintings with professional techniques and essential care tips.

Start Cleaning Safely

Key Takeaways

  • ✓ Always test cleaning solutions on an inconspicuous area first.
  • ✓ Never use harsh chemicals, household cleaners, or excessive water.
  • ✓ Professional restoration is often recommended for valuable or delicate pieces.
  • ✓ Regular dusting with a soft brush can prevent dirt buildup.
  • ✓ Varnish removal should only be attempted by experienced conservators.

How It Works

1
Assess the Painting's Condition

Before any cleaning, carefully examine the painting for cracks, flaking paint, or unstable areas. This initial assessment guides your cleaning approach and identifies potential risks.

2
Gentle Dusting and Surface Cleaning

Begin with the lightest touch, using a soft brush or cotton balls to remove loose dust and superficial grime. This step prevents abrasive particles from scratching the surface during deeper cleaning.

3
Targeted Spot Cleaning (If Necessary)

For stubborn spots, use specialized art cleaning solutions sparingly, applied with a cotton swab and tested beforehand. Work in small, controlled areas to avoid over-saturating the canvas.

4
Final Inspection and Protection

After cleaning, allow the painting to dry thoroughly and inspect it under various lighting. Consider applying a fresh coat of conservation-grade varnish, if appropriate and with expert guidance, to protect the cleaned surface.

Understanding the Delicate Nature of Oil Paintings and When to Clean Them
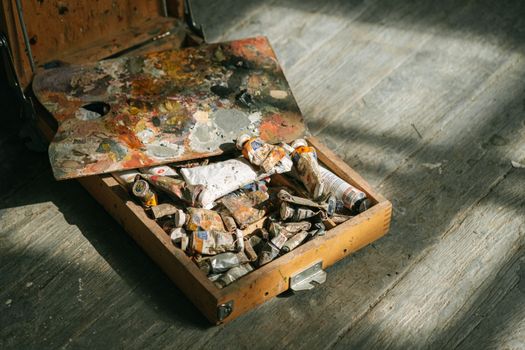
Close-up of a wooden paint set with colorful tubes and palette on a textured floor. Photo: Ivan S / Pexels
Oil paintings are complex works of art, composed of multiple layers: the support (canvas, wood panel), ground, paint layers, and often a protective varnish. Each component can react differently to environmental factors like humidity, temperature fluctuations, and pollutants, leading to deterioration over time. Understanding this intricate structure is the first step in learning how to clean oil paintings effectively and safely. Over time, oil paintings accumulate surface grime, dust, nicotine stains, and even biological growth, which can obscure the original colors, dull the varnish, and accelerate degradation. The decision of *when* to clean an oil painting is crucial. It's not a routine task to be undertaken without careful consideration. A painting might simply require a light dusting, or it could be suffering from a thick layer of discolored varnish that warrants professional intervention. Factors indicating a need for cleaning include a noticeable dullness in colors, a yellowed or darkened varnish layer, visible dirt or grime accumulation, or the presence of specific stains. However, it's vital to distinguish between surface dirt and ingrained damage. Aggressive cleaning can cause irreversible harm, such as paint loss, abrasion, or chemical reactions that alter the pigments. For instance, a painting that has been exposed to cigarette smoke for decades will have a tenacious layer of nicotine residue that household cleaners will only smear and potentially damage the paint beneath. Similarly, attempting to remove a severely yellowed natural resin varnish without the proper solvents and expertise can strip away paint layers or leave a patchy, uneven surface. Therefore, a thorough assessment of the painting's condition and the nature of the dirt is paramount. If you're unsure, or if the painting holds significant sentimental or monetary value, always err on the side of caution and consult with a professional art conservator. They possess the specialized knowledge, tools, and controlled environment necessary to safely assess and treat delicate artworks, ensuring their longevity and preserving their artistic integrity for future generations. Ignoring these foundational principles can lead to irreparable damage, turning a cleaning attempt into a costly restoration, or worse, a permanent alteration of the artwork.

Essential Supplies and Preparations for Safe Oil Painting Cleaning
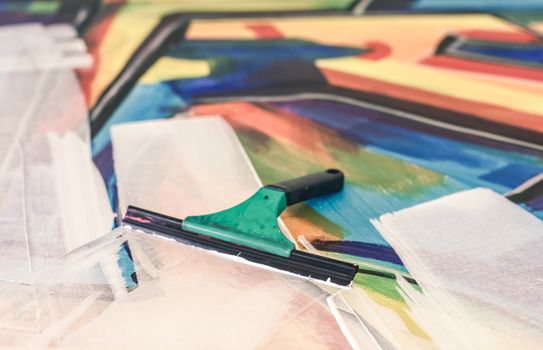
Close-up of a colorful abstract painting utilizing a squeegee technique for artistic texture. Photo: Steve A Johnson / Pexels
Before embarking on the process of how to clean oil paintings, gathering the right supplies and preparing your workspace is non-negotiable. Using improper materials can lead to irreversible damage. Your toolkit should be purpose-built for delicate art conservation, not general household cleaning. Here’s a breakdown of essential items: Firstly, you'll need a very soft, natural-bristle brush, such as a large, clean sable brush or a soft cosmetic brush, for dusting. Avoid synthetic brushes or feather dusters, which can scratch or leave behind fibers. Next, gather several packs of pure, unbleached cotton balls or lint-free cotton swabs. These are crucial for applying cleaning solutions in a controlled manner and absorbing grime. For cleaning solutions, this is where caution is paramount. Never use water, soap, window cleaner, ammonia-based products, or any harsh household detergents. These can react with the oil paint, dissolve varnish, or cause swelling and cracking. Instead, consider specialized art cleaning solutions, often referred to as 'conservation cleaning solutions' or 'museum-grade cleaning agents.' These are typically formulated with specific, mild solvents designed to dissolve surface grime without affecting the underlying paint or varnish. Examples include diluted saliva (yes, human saliva contains enzymes that can break down protein-based dirt without harming oil paint, but it must be fresh and applied sparingly), or commercial art cleaning gels/emulsions available from reputable art conservation suppliers. Always read the instructions carefully and understand the chemical composition. Additionally, you'll need a clean, soft cloth (microfiber or lint-free cotton) for blotting and drying. A stable, clean, and well-lit workspace is also critical. Lay down a clean, soft towel or blanket to protect the painting and your work surface. Ensure good ventilation if using any solvents. Have a magnifying glass handy for close inspection of the painting's surface, and a pair of clean, white cotton gloves to avoid transferring oils and dirt from your hands to the artwork. Remember, preparation isn't just about having the right tools; it’s about creating a safe, controlled environment where you can work meticulously and without distractions. Rushing or cutting corners in this stage can jeopardize the integrity of your cherished artwork. Always prioritize the painting's safety above all else, even if it means investing a little more in specialized supplies. This meticulous approach is foundational to successfully understanding how to clean oil paintings without causing harm.

Step-by-Step Guide to Gently Cleaning Your Oil Painting
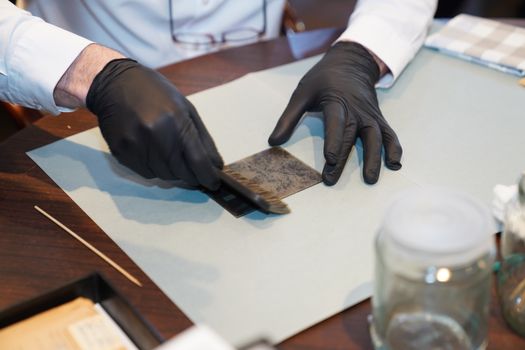
A restorer carefully working on a photograph with gloves and brush, focusing on details. Photo: Tahir Xəlfəquliyev / Pexels
Once you've assessed your painting and gathered your supplies, you can proceed with the cleaning process, always remembering that gentleness and patience are key. This step-by-step guide outlines the safest methods for how to clean oil paintings at home, focusing on surface dirt removal. **Step 1: Initial Dusting.** Begin by gently dusting the entire surface of the painting with your soft, natural-bristle brush. Hold the brush at an angle and use very light, sweeping motions. The goal is to remove any loose dust particles, cobwebs, or superficial debris that could scratch the paint surface during subsequent steps. Do not press down or scrub. If the painting is very old or has visible cracks, proceed with extreme caution, or skip this step if you fear dislodging paint flakes. **Step 2: Dry Cotton Ball Cleaning.** Take a clean, dry cotton ball and gently roll it across a small, inconspicuous area of the painting, such as the edge near the frame or a dark, non-critical spot. Observe if any grime transfers to the cotton ball. If it does, continue rolling fresh cotton balls over the surface, always using a clean section for each pass. This dry method can remove a surprising amount of surface grime without introducing any moisture. If the cotton ball snags or leaves fibers, stop immediately and re-evaluate the painting's surface for flaking paint. **Step 3: Targeted Spot Cleaning (If Necessary).** For more stubborn grime that the dry method couldn't remove, you might consider a very mild, specialized cleaning solution. *This step carries the highest risk and should be approached with extreme caution.* Dip a cotton swab into your chosen conservation-grade cleaning solution (e.g., diluted saliva or a commercial art cleaning emulsion). Blot any excess liquid so the swab is barely damp. Test on an inconspicuous area first, observing for any color lifting, dulling, or adverse reactions. If safe, gently roll the damp cotton swab over a very small section (no larger than a dime). Do not rub or scrub. Immediately follow with a fresh, dry cotton swab to absorb any residue and moisture. Change cotton swabs frequently, using a clean one for each small area. Work slowly and methodically, section by section. Never saturate the canvas. If you notice any paint coming off on the swab, stop immediately. **Step 4: Frame Cleaning (Optional but Recommended).** While not directly part of cleaning the painting itself, cleaning the frame can significantly enhance the overall appearance. Use a soft brush and a slightly damp cloth to wipe down the frame, being careful not to let any moisture come into contact with the painting. For ornate or gilded frames, use a dry brush only, as water can damage gilding. **Step 5: Final Inspection.** Once cleaning is complete, allow the painting to air dry completely in a dust-free environment. Avoid direct sunlight or heat sources. Inspect the painting thoroughly under different lighting conditions to ensure no residue remains and that the surface is uniformly clean. If you are unsure at any point, or if the painting does not respond to gentle cleaning, it is always best to seek professional advice.

Common Mistakes to Avoid and When to Call a Professional Conservator

Female artist deeply engaged in painting at her creative studio workspace. Photo: Andrea Piacquadio / Pexels
When attempting how to clean oil paintings, certain actions can lead to irreparable damage. Being aware of these common mistakes is as crucial as knowing the correct procedures. Furthermore, recognizing when a task is beyond your expertise and requires professional intervention is a sign of responsible ownership. **Common Mistakes to Avoid:** * **Using Household Cleaners:** This is perhaps the most significant error. Products like Windex, dish soap, furniture polish, or even plain water can dissolve paint, leave chemical residues, cause discoloration, or promote mold growth. They are not formulated for delicate artwork. * **Rubbing or Scrubbing:** Oil paint, especially on older or damaged canvases, can be brittle. Aggressive rubbing can physically abrade paint layers, scratch the surface, or dislodge flaking paint. * **Ignoring Test Patches:** Skipping the step of testing any cleaning solution on an inconspicuous area is a recipe for disaster. Different paints and varnishes react uniquely, and what works on one painting may harm another. * **Over-saturating the Surface:** Applying too much liquid can cause the canvas to swell, lead to tidelines, or allow moisture to seep into the paint layers, potentially causing delamination or mold. * **Attempting Varnish Removal:** Removing old, yellowed varnish is a highly specialized process. It requires specific solvents, precise application, and a deep understanding of paint chemistry. Attempting this without professional training almost always leads to irreversible damage, such as stripping paint or leaving an uneven, patchy surface. * **Using Abrasive Materials:** Sponges, paper towels, or rough cloths can scratch the delicate surface of an oil painting. * **Drying with Heat:** Using hairdryers or placing a painting in direct sunlight to dry can cause rapid expansion and contraction, leading to cracking or warping of the canvas and paint layers. **When to Call a Professional Conservator:** * **Valuable or Sentimental Paintings:** If the painting holds significant monetary value, historical importance, or deep personal sentiment, the risk of DIY cleaning is too high. A professional can ensure its preservation. * **Extensive Damage:** If the painting has flaking paint, tears, holes, deep cracks, mold, or extensive discoloration that seems to be within the paint layers rather than just surface grime. * **Varnish Discoloration:** When the primary issue is a severely yellowed or darkened varnish layer that obscures the artwork's original colors. Varnish removal is a conservator's domain. * **Unknown History or Materials:** If you don't know the painting's age, the type of paint used, or its previous conservation history, it's safer to consult an expert. * **Lack of Confidence:** If you feel uncomfortable or unsure at any stage, trust your instincts. The potential for damage outweighs the cost of a professional consultation. Professional conservators have extensive training, specialized equipment, and access to a range of conservation-grade materials. They can perform detailed analyses, such as UV light examination, to understand the painting's condition and previous interventions, allowing them to choose the safest and most effective treatment plan. Their work extends beyond cleaning to include structural repairs, inpainting, and protective varnishing, ensuring the artwork's long-term stability and aesthetic integrity.

Comparison

FeatureDIY Gentle CleaningProfessional ConservationHousehold Cleaners (AVOID)
Risk of DamageLow (if done correctly)Very Low (expert care)High (irreversible)
CostLow (supplies only)High (specialized service)Low (but costly damage)
EffectivenessSurface grime onlyComprehensive restorationIneffective/Harmful
Varnish Removal
Required ExpertiseBasic care knowledgeExtensive trainingNone (but dangerous)

What Readers Say

"This guide on how to clean oil paintings was incredibly thorough and reassuring. I managed to gently remove years of dust from my grandmother's portrait, and the colors look so much brighter now. The emphasis on testing first saved me from a potential mishap!"

Eleanor Vance · Boston, MA

"As an amateur art collector, I found this article invaluable. The step-by-step instructions on dusting and using cotton balls for surface grime were easy to follow and produced fantastic results on a landscape painting I inherited. It truly helped me preserve its beauty."

Marcus Chen · Seattle, WA

"The section on when to call a professional was a game-changer. I was about to attempt cleaning a very old, cracked painting, but after reading this, I contacted a conservator. It gave me peace of mind and ensured the artwork's safety, preventing a costly mistake."

Sarah Jenkins · Austin, TX

"While most of my paintings only needed light dusting, this guide provided excellent context on the 'why' behind each step. It's a bit cautious, which is good, but for really ingrained dirt, it rightly points you towards professional help, which is a realistic expectation for delicate art."

David Rodriguez · Chicago, IL

"I used the dry cotton ball method on a painting that had a dull film from being stored in an attic. The difference is remarkable! The colors popped without me having to use any liquids, which was my biggest fear. Highly recommend this approach for basic cleaning."

Linda Peterson · Miami, FL

Frequently Asked Questions

What is the safest way to clean an old oil painting?

The safest initial step for cleaning an old oil painting is gentle dry dusting with a very soft, natural-bristle brush, followed by carefully rolling pure cotton balls across the surface to pick up loose grime. For more stubborn surface dirt, a professional conservation cleaning solution, tested on an inconspicuous area, may be used sparingly with cotton swabs. Always prioritize minimal intervention and consult a conservator for valuable or heavily soiled pieces.

Can I use water or soap to clean my oil painting?

No, absolutely not. Using water, soap, or any household cleaners (like Windex, dish soap, or ammonia-based products) is highly discouraged. These substances can react negatively with the oil paint and varnish layers, causing irreparable damage such as dissolving paint, leaving residues, causing discoloration, or promoting cracking and mold growth. Stick to specialized art cleaning methods or professional help.

How do I remove yellowed varnish from an oil painting?

Removing yellowed varnish from an oil painting is a highly specialized conservation task that should only be performed by a professional art conservator. It involves using specific solvents with precise control to dissolve the varnish layer without affecting the underlying paint. Attempting this at home without expert knowledge and tools almost guarantees irreversible damage to your artwork.

Is professional oil painting cleaning expensive?

The cost of professional oil painting cleaning and restoration varies significantly based on the painting's size, condition, the type of damage, and the conservator's expertise. While it can be a significant investment, especially for complex treatments like varnish removal or structural repairs, it's often a worthwhile expense to preserve the painting's artistic, historical, and monetary value. Always request a detailed estimate and treatment proposal.

How does professional cleaning differ from DIY cleaning?

Professional cleaning by a conservator involves a comprehensive assessment using specialized equipment (like UV light), precise control over conservation-grade solvents and materials, and often includes structural repairs, inpainting, and re-varnishing. DIY cleaning, as described here, focuses on safe, superficial removal of loose dust and surface grime, carrying inherent risks if not done meticulously. Professional cleaning addresses deeper issues and ensures long-term preservation, which DIY cannot.

Who should attempt to clean an oil painting?

Only individuals who have thoroughly researched and understood the delicate nature of oil paintings, are comfortable with meticulous, gentle work, and are willing to take extreme precautions should attempt basic surface cleaning. For valuable, antique, or visibly damaged paintings, or if you lack confidence, a professional art conservator is the appropriate choice. Never attempt extensive cleaning or varnish removal without professional training.

What are the risks of improperly cleaning an oil painting?

Improper cleaning of an oil painting carries numerous risks, including paint loss, abrasion, chemical reactions causing discoloration or dulling, cracking, swelling of the canvas, mold growth, or the complete stripping of paint layers. These damages are often irreversible and can significantly diminish the aesthetic, historical, and monetary value of the artwork.

Are there new technologies for cleaning oil paintings?

Yes, art conservation is an evolving field. Modern conservators utilize advanced techniques and technologies, such as laser cleaning for specific types of grime, solvent gels that minimize solvent penetration, and nanotechnology for targeted stain removal. These innovations allow for more precise and safer interventions, often reducing the risk to the artwork compared to traditional methods. However, these are exclusively for professional use.

Preserving the beauty of your oil paintings is a rewarding endeavor. By understanding how to clean oil paintings safely and knowing when to seek professional help, you can ensure your cherished artworks remain vibrant for generations to come. Take the first step today to protect your artistic heritage.

Topics: how to clean oil paintingsrestore old oil paintingoil painting conservationsafely clean artworkoil painting cleaning supplies
Leo List
Brampton weed
Adultwork EstrelaBet Vai de Bet R7 Bet Betão Galera Bet Rainbet Bet9ja Shop SportyBet BetKing Sisal Loto Foot Hollywoodbets YesPlay Odibets RushBet Jugabet BetWarrior BetCity MSport betPawa Fortebet